Quick Start Guide
In this Quick Start Guide we'll wire up one of the SparkFun Gas Sensor - GM-XX2B (Qwiic) into a Qwiic circuit with an IoT RedBoard and use the second example in the SparkFun GM-x02B Arduino library to measure the sensor's clean air resistance value (R0) as a reference value and then its gas response continuously after. This guide assumes users have a working knowledge of Qwiic circuits, the Arduino IDE and using libraries.
Qwiic Assembly
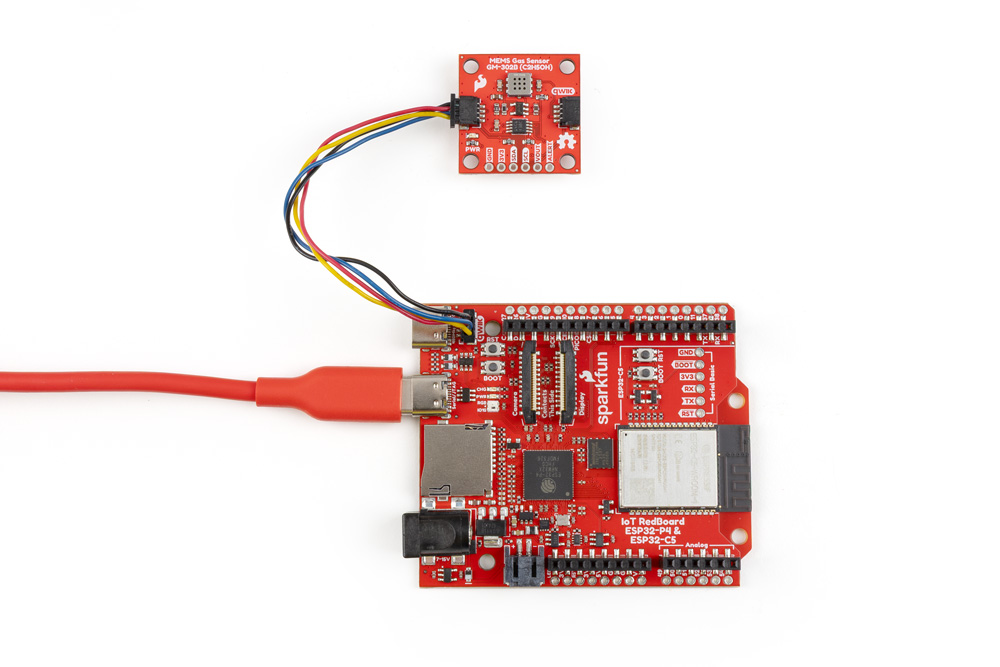
Since this is a Qwiic sensor all we'll need to do is connect it to the RedBoard and then connect the RedBoard to a computer:
- Connect the Gas Sensor to the IoT RedBoard with a Qwiic cable.
- Connect the RedBoard to a computer over USB-C
After wiring everything up it should look similar to the photo below:
Arduino Example - Clean Air Response
We'll use the second example in the SparkFun GM-X02B Arduino library to get a baseline reading from the sensor in a known clean-air environment and then report the gas readings every one second. This example uses the getGasResponse() function so relative gas measurement works identically on every GM-xx2B variant. The getGasResponse() function uses either R0/Rs on parts with falling resistance and Rs/R0 on parts with rising resistance (GM-102B only). This setting makes it so the value sits near 1.0 in clean air and rises with the target gas for all nine gas sensors. All examples in the library require selecting the correct sensor at the top of the code by commenting/uncommenting out the correct board.
Make sure to keep the board in a known clean-air environment during the warmup period and during the to get the correct baseline value after the warmup period. Open the example with the following steps:
- Open the Arduino IDE
- Install the SparkFun GM-X02B Arduino library by searching for "SparkFun GM-X02B" in the Libraray Manager tool. Note, this library requires the SparkFun Toolkit to be installed as well. Install that library by searching for "SparkFun Toolkit" in the Library Manager.
- Open "Example02_CleanAirResponse" from the GM-X02B library.
- Comment/uncomment out the board used. The example defaults to use the GM-602B with
SfeGM602BArd mySensor;. - Select your Board and Port and click the "Upload" button.
- After the code finishes uploading, open the serial monitor with the baud set to 115200.
The example starts by printing out the connected board, target gas type and rated sensitivity response at the concentrated ppm value for the sensor. After this, it runs the warmup for three minutes and prints out the warmup sensor resistance (Rs) every ten seconds.
Once the warmup finishes, the example takes an average from 16 clean air readings and stores the result as R0. For an actual application, save the measured R0 (e.g. to EEPROM) and restore it with setCleanAirResistance_Ohm() instead of recalibrating on every boot. After setting R0, the code then prints out values for sensor resistance (in Ohms), the ratio and gas response values every second. If the measurements exceed the flag set earlier it prints out an elevated reading was detected.
Code to Note
Sensor Selection
Each example includes a list of defines for each of the nine sensors. Make sure to uncomment the board(s) used and comment out the unused boards. Below we've commented out the default board (GM-602B) and uncommented the GM-302B:
// SfeGM102BArd mySensor;   // GM-102B - nitrogen dioxide (NO2)
// SfeGM202BArd mySensor;   // GM-202B - alcohol, smoke
SfeGM302BArd mySensor;   // GM-302B - ethanol
// SfeGM402BArd mySensor;   // GM-402B - methane, propane
// SfeGM502BArd mySensor;   // GM-502B - VOCs
// SfeGM512BArd mySensor;   // GM-512B - breath odor
// SfeGM602BArd mySensor;      // GM-602B - hydrogen sulfide (H2S)
// SfeGM702BArd mySensor;   // GM-702B - carbon monoxide (CO)
// SfeGM802BArd mySensor;   // GM-802B - ammonia (NH3)
Elevated Readings Flag
The example sets a flag for an elevated reading. Adjust this value for your environment:
const float kDetectResponse = 1.5;
getRatedSensitivity() works as reasonable upper anchor (the response this part is specified to reach at its rated ppm).
Warmup Time
Depending on your sensor, you'll want to adjust the warmup period. The example defaults to three minutes for a quick demo but longer is better:
const unsigned long kWarmupMillis = 3UL * 60UL * 1000UL;